Essential Tips from Florida Painters: How Often Should You Repaint Your Walls

Professional painter holding a paint roller soaking in white wall paint Professional painter at work. Painter painting the walls with a painters roller and brush for more precise application. Painter using a ladder to reach the sealing and higher places. Construction worker painting the walls with white wall paint. Room makeover in progress. house painters stock pictures, royalty-free photos & images

Repainting your walls can significantly enhance the appearance and feel of your home, but many homeowners struggle to determine when it’s time for a fresh coat of paint. Factors such as room type, wall condition, and lifestyle can all affect how frequently you should consider repainting. Below, we’ll explore the key aspects to help you maintain beautiful and long-lasting interiors.

Best Timeframes Recommended by House Painters Florida for Repainting

  • Living Rooms and Dining Rooms: These areas tend to experience less wear and tear compared to high-traffic rooms. Repainting every 5–7 years is often sufficient unless the walls are exposed to constant sunlight or smoke.
  • Bedrooms: Adult bedrooms typically require repainting every 5–7 years. Children’s rooms or playrooms, however, may need more frequent updates (around 3–4 years) due to scuffs, drawings, or other damages caused by active use.
  • Kitchens and Bathrooms: Kitchens are subject to grease splatters and heat exposure; bathrooms deal with humidity. These factors mean these spaces should be repainted every 3–4 years using durable paint that resists moisture and stains.
  • Hallways and Corridors: As high-traffic areas prone to dirt, fingerprints, and scuff marks, hallways may need repainting every 2–3 years depending on their condition.
  • Ceilings: Ceilings usually last longer than walls but may require a refresh every 7–10 years or sooner if there are issues such as watermarks or discoloration from light fixtures.

Key Factors That Impact Repainting Frequency for Painting Services Florida

  1. Premium paints usually offer better durability than cheaper alternatives.
  2. Look for paints with features like stain resistance or UV protection if your home faces specific challenges (e.g., direct sunlight exposure).
  3. Properly primed surfaces ensure better adhesion and longer-lasting results.
  4. Skipping preparation steps such as cleaning or sanding may shorten the lifespan of your paint job.
  5. Homes with pets or young children often face more wear on walls due to scratches, smudges, or accidents.
  6. Open-concept spaces where cooking odors travel freely might lead to faster discoloration of walls.
  7. Areas exposed to direct sunlight may fade faster due to UV rays.
  8. Humidity-prone zones (like bathrooms) can cause peeling without the right moisture-resistant paint.

When to Consider Interior & Exterior Painting Florida Homes

  • Fading colors that no longer look vibrant.
  • Peeling or cracking paint due to poor adhesion or prolonged exposure to moisture.
  • Stains that cannot be cleaned off effectively.
  • Visible damage like dents, chips, scratches, or mold growth that affects the aesthetic appeal of the space.

Benefits of Regular Painting Maintenance

Benefit Explanation
Protection Against Wear Fresh paint helps shield walls from everyday scratches and environmental factors like humidity.
Improved Air Quality Modern low-VOC paints reduce harmful fumes for healthier indoor air quality.
Enhanced Resale Value Neutral-colored freshly painted walls attract potential buyers.
Personal Enjoyment Updated colors create a rejuvenated atmosphere aligned with evolving tastes.

By paying attention to these guidelines—and staying aware of changes in wall condition—you can ensure that your home remains both visually appealing and structurally sound over time.

Factors That Influence How Frequently You Should Repaint Your Walls with a Painting Company in Florida

Repainting your walls is an essential part of home maintenance and design. However, determining how often to repaint depends on a variety of factors, all of which play a role in the longevity of the paint and its aesthetic appeal. Below are some of the key factors that influence repainting frequency and what you should consider when planning your next project.

1. Room Usage and Traffic Levels

Certain rooms experience more wear and tear than others due to their usage. High-traffic spaces will typically need repainting more frequently.

  • Hallways, kitchens, and living rooms require repainting every 2-5 years due to scuffs, stains, and general wear.
  • Children’s bedrooms may also need more frequent attention because of fingerprints or wall art.
  • Guest rooms or formal dining rooms can go longer without a refresh—every 5-7 years—since they see less activity.

2. Paint Type and Quality

The type and quality of the paint used during your last project significantly affect its durability.

Paint Finish Durability Rating Suggested Use Cases
Flat/Matte Low Low-traffic areas like bedrooms or ceilings
Eggshell/Satin Medium Living rooms, dining areas, or moderately used spaces
Semi-gloss/Gloss High Kitchens, bathrooms, trim work

High-quality paints from reputable brands often last longer due to their superior formulation. Investing in premium options upfront can lower repainting frequency over time.

3. Exposure to Sunlight

Walls exposed to direct sunlight may fade faster than those in shaded areas. UV rays can cause colors to dull over time.

  • South-facing walls or rooms with large windows might require touch-ups every few years if fading becomes noticeable.
  • Consider using UV-resistant paints or window treatments (like blinds) to minimize sun exposure.

4. Interior Climate Conditions

  • High-Humidity Areas: Bathrooms, laundry rooms, and kitchens are prone to moisture buildup that can lead to peeling or mold growth on painted surfaces.
  • Recommendation: Opt for mildew-resistant paint for these areas and plan for touch-ups every 3–4 years.

5. Color Trends vs. Personal Style

  • If you like keeping up with interior design trends (e.g., popular color palettes), you might choose to refresh your walls every couple of years.
  • For a timeless look that doesn’t age quickly, select neutral tones that won’t feel outdated even after many years.

Tips for Extending Wall Paint Longevity

  1. Regularly clean painted surfaces using a damp cloth or sponge—especially in high-touch areas.
  2. Address damage quickly by patching holes or filling cracks before they worsen.
  3. Use washable paints in high-use spaces—they’re easier to maintain without requiring full repaints.
  4. Protect walls from furniture damage by using bumpers behind chairs or tables near surfaces.

By evaluating these factors carefully, homeowners can create a customized painting schedule that balances practicality with aesthetics while ensuring their living spaces remain visually appealing for years to come.

General Guidelines for Repainting Your Home: What Every Homeowner Should Know

Repainting your home not only refreshes the appearance of your living spaces but also helps maintain the quality and longevity of your walls. However, determining how often to repaint and what factors to consider can be a challenge for many homeowners. Below, we cover essential guidelines to help you navigate this process effectively.

1. Understand the Lifecycle of Paint in Different Rooms

Room Type Average Time Before Repainting
Living Rooms 5-7 years
Bedrooms 5-7 years
Kitchens 3-5 years
Bathrooms 3-4 years
Hallways & Corridors 2-4 years

Rooms that experience higher humidity, frequent cleaning, or higher traffic (like hallways or kitchens) tend to require repainting more frequently compared to low-traffic areas like formal living rooms.

2. Evaluate the Condition of Your Walls

Before deciding whether it’s time to repaint, inspect your walls for signs that they need attention:

Fading Colors: If sunlight exposure has dulled vibrant colors, it’s time for a refresh.

Peeling or Cracking Paint: These indicate that the paint has deteriorated and needs replacement.

Scuff Marks or Stubborn Stains: High-contact areas often accumulate marks over time.

Mold or Mildew: Particularly relevant in bathrooms or basements where moisture is prevalent.

If any of these issues persist despite regular cleaning, consider scheduling a repaint.

3. Choose Appropriate Paint Finishes

Finish Type Best For
Matte/Flat Low-use spaces like adult bedrooms
Eggshell Living rooms and dining areas
Satin High-use rooms such as kitchens
Semi-gloss Bathrooms and trim work
Gloss Doors, cabinets, and accent details

Using finishes suited to specific spaces can prolong their durability and enhance resistance against wear.

4. Budgeting for Repainting

Planning your budget ensures you get quality results without overspending:

Paint Costs: Premium paints typically last longer but come at a higher price point. Consider if high-end options fit your needs.

Labor Costs: If hiring professionals, expect labor charges depending on room size and complexity.

Preparation Materials: Primer, tape, brushes/rollers add to costs if you’re handling it yourself.

It’s helpful to compare quotes from professional painters if you lack experience with DIY projects.

5. Timing Your Project Strategically

Certain times of year are more conducive for interior painting:

1. Spring & Fall: Moderate temperatures make these seasons ideal as they prevent paint from drying too quickly or too slowly.

2. During Renovations: Painting after structural updates ensures you don’t need touch-ups later on.

3. Before Moving In: An unoccupied home allows faster completion without furniture obstructions.

Scheduling an optimal time ensures both efficiency and better results.

By following these guidelines carefully, homeowners can keep their interiors looking fresh while protecting their investment over time.

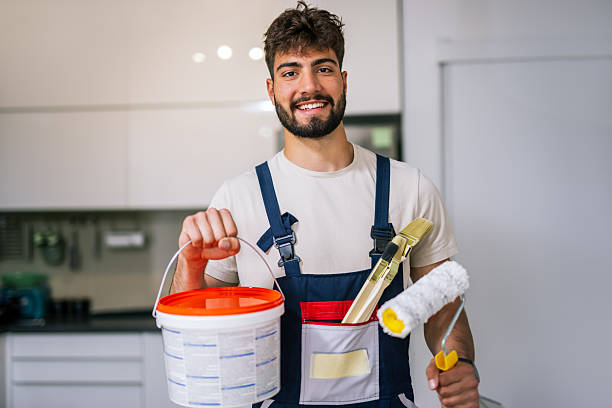
When and Why You Should Hire Professional Painting Services for Your Next Project

Painting your home’s interior can seem like a straightforward task, but the reality is that achieving a flawless and durable finish requires skill, precision, and expertise. While many homeowners may consider DIY painting to save costs, hiring professional painters often proves to be a more efficient and higher-quality solution. Here are several reasons why you should consider hiring professionals for your next painting project.

Man pours paint into the tray and dips roller. Professional interior construction worker pouring white color paint to tray. Man pours paint into the tray and dips roller. Professional interior construction worker pouring white color paint to tray. house painters stock pictures, royalty-free photos & images

Benefits of Hiring Professional Painters

  1. Superior Quality Results
    Professionals have an eye for detail and experience in delivering smooth, even finishes. They know how to address imperfections on walls such as cracks, uneven textures, or stains before applying paint.
  2. Time Efficiency
    Painting an entire house—or even a single room—can be time-consuming, especially if you’re not experienced. Professionals work with streamlined processes and tools to complete projects faster while maintaining quality.
  3. Access to Specialized Tools & Techniques
    From high-quality brushes and rollers to advanced sprayers, professional painters use specialized equipment that ensures higher precision in application.
  4. Expert Knowledge About Paints & Finishes
    Choosing the right type of paint for different surfaces is crucial for durability and aesthetics. Professionals are well-versed in selecting paints suitable for high-traffic areas, bathrooms prone to humidity, or spaces that require washable finishes.
  5. Safety Considerations
    Painting can involve working on ladders or dealing with fumes from paints and primers. Professionals follow safety protocols to minimize risks during the project.

Key Scenarios Where Hiring Professional Painters Is Essential

  • Large-Scale Projects: Painting multiple rooms or an entire home requires logistics planning that professionals can handle efficiently.
  • Specialized Techniques: If you’re looking for decorative finishes like faux painting, wall textures, or intricate trim work.
  • Preparation Challenges: Walls with water damage, peeling paint, or mold require careful preparation before repainting.
  • Tight Timelines: If you need the job completed quickly due to moving deadlines or upcoming events.

Cost Considerations: DIY vs Professional Services

Aspect DIY Approach Professional Painters
Skill Level Required Moderate to High Expert
Time Investment High (learning curve + actual painting) Low
Quality of Finish Variable (depends on experience) Consistently High
Equipment Needed Must purchase/borrow Provided by professionals
Long-Term Durability May vary; improper prep affects results Excellent; surfaces properly prepped

How To Choose the Right Painting Contractor

  1. Look for licensed and insured companies.
  2. Request multiple quotes for comparison.
  3. Check online reviews or ask for references from past clients.
  4. Verify their experience with your specific type of project (e.g., interior vs exterior painting).
  5. Ask about warranties on their work.

By understanding when it makes sense to hire professional painters and how they add value to your project, you can ensure your home’s interiors look stunning while saving time and minimizing stress.

How to Choose the Perfect Colors and Finish for Your Interior Painting Project

Selecting the right colors and finishes for your interior spaces is a crucial step in creating a cohesive and aesthetically pleasing environment. The combination you choose not only affects the overall ambiance of your home but also plays a role in functionality, lighting, and personal style. Here’s a comprehensive guide to help you make informed decisions when choosing colors and finishes for your interior painting project.

Understand the Impact of Color Psychology

Colors have a profound impact on mood, perception, and energy levels. Before finalizing your color palette, consider how each hue will affect the space:
Warm Colors (e.g., red, orange, yellow): These evoke feelings of warmth, energy, and comfort. They are ideal for social spaces like living rooms or dining areas.
Cool Colors (e.g., blue, green): These foster serenity, relaxation, and focus. They work well in bedrooms or home offices.
Neutral Tones (e.g., beige, gray): Timeless and versatile options that create balance in any room. Neutrals can serve as primary wall colors or as complementary tones to bolder hues.

Evaluate Light Exposure

Natural light significantly influences how paint colors appear throughout the day. To ensure your chosen shade works well in your space:
– Test paint swatches on multiple walls to observe them under different lighting conditions (morning sunlight vs. evening artificial light).
– Lighter shades can help brighten dimly lit rooms by reflecting more light. – Consider darker tones for well-lit areas where strong sunlight won’t overpower or wash out bold colors.

Choose Paint Finishes Based on Room Usage

Finish Type Description Best Use Case
Matte/Flat Non-reflective; hides imperfections Bedrooms & low-traffic areas
Eggshell Slight sheen; easy to clean Living rooms & dining areas
Satin Smooth finish with moderate shine Kitchens & bathrooms
Semi-gloss Durable; reflects more light Trim work & high-moisture spaces like bathrooms
High-gloss Very shiny; highly durable Doors & cabinets

Coordinate with Existing Décor

Your interior paint should harmonize with existing furniture, flooring, cabinetry, and accessories to achieve a balanced look:

– Begin by identifying key features of each room (e.g., dark wood floors or vibrant rugs) that will influence your color selection.

– Use complementary or analogous color schemes to enhance visual flow between adjacent spaces.

Complementary Scheme: Combines opposite hues on the color wheel (e.g., blue walls with orange accents).

Analogous Scheme: Groups similar tones next to each other on the wheel (e.g., blues paired with greens).

Experiment Before Committing

Purchasing small tester cans allows you to try out different combinations before undertaking full-scale painting:

– Paint large sample squares directly onto walls instead of relying solely on paper swatches.

– Compare how they look during various times of day under changing light conditions.

By carefully considering these factors—color psychology, lighting effects, appropriate finishes for functionally distinct spaces—and aligning them with personal preferences or existing décor elements—you’ll create an inviting atmosphere tailored perfectly for your home’s unique needs.

Top Tips for Achieving a Flawless Finish When Repainting Your Home’s Interior Spaces

Repainting your home’s interior can completely rejuvenate your space, but achieving a flawless finish requires careful planning, the right tools, and proper techniques. Below are essential tips to help you achieve a professional-grade result while avoiding common pitfalls.

Preparing Your Walls

  • Clean the Surfaces: Dust, grease, and dirt can prevent paint from adhering smoothly. Use a mild detergent solution or trisodium phosphate (TSP) cleaner to remove residue.
  • Repair Imperfections: Patch holes, cracks, and dents with spackle or joint compound. Sand down rough patches to create a smooth surface.
  • Remove Old Paint: If the current paint is peeling or flaking, use a scraper or sandpaper to remove it before applying fresh coats.
  • Tape Off Edges: Use painter’s tape to cover trims, windowsills, and other areas you don’t want painted for crisp lines.

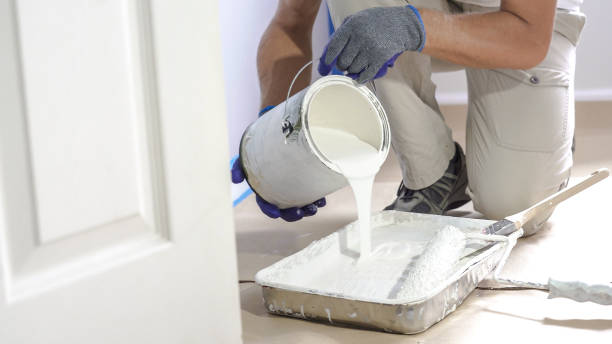
Selecting Quality Tools and Materials

  • Brushes: A high-quality angled brush works well for edges and corners.
  • Rollers: Choose rollers with appropriate nap lengths depending on your wall texture—short naps for smooth walls and thicker naps for textured walls.
  • Paint Trays: Durable trays with liners make cleanup easier.
  • Primer: A good primer ensures better adhesion of paint and hides imperfections.
Tool Recommended Type Purpose
Brushes Angled nylon/polyester For cutting edges
Rollers 3/8″ nap microfiber Smooth surface application
Roller Frame Sturdy metal frame Holds roller securely
Primer Stain-blocking or tinted type Enhances coverage & adhesion

Applying Paint Like A Pro

  1. Prime First: Always apply a primer if switching from dark to light colors or when painting over unpainted surfaces like drywall.
  2. Cut in First: Start by painting edges near trim, ceilings, and corners with an angled brush before using rollers on larger areas.
  3. Use “W” Strokes: When rolling paint onto walls, use overlapping “W” strokes to ensure even distribution of paint without visible roller marks.
  4. Avoid Overloading Brushes/Rollers: Excessive paint on tools can cause dripping; load just enough for controlled application.

Creating a Smooth Finish

  • Apply thin coats rather than one thick coat; multiple thin layers provide better coverage without dripping.
  • Allow sufficient drying time between coats as recommended by the manufacturer’s instructions.
  • Lightly sand between coats using fine-grit sandpaper (220 grit) for a smooth finish.

Post-Painting Cleanup

  • Remove painter’s tape while the paint is still slightly wet to avoid peeling off dried layers.
  • Clean brushes and rollers immediately using water-based solutions for latex paints or mineral spirits for oil-based paints.
  • Check for any missed spots or uneven areas after drying fully; touch up as needed.

By adhering to these strategies step-by-step—from preparation through cleanup—you’ll be able to transform your interior spaces with precision while ensuring lasting beauty that stands up over time.

The Ultimate Guide to Transforming Your Home Through Expert Painting Techniques

Transforming your home with a fresh coat of paint is one of the most effective ways to rejuvenate your living spaces. Whether you’re aiming for a subtle refresh or a bold change, understanding expert painting techniques can make all the difference in achieving a professional and long-lasting finish. Below, we explore essential tips, methods, and tools that can elevate your painting project from ordinary to extraordinary.

Preparing Your Space for Success

  1. Remove furniture or cover it with drop cloths.
  2. Use painter’s tape along baseboards, trim, and fixtures to prevent unwanted paint splatter.
  3. Wash walls with mild soap and water to remove dust or grease.
  4. Patch holes or cracks using spackle or wood filler; sand down the area for smoothness.
  5. Apply a primer if switching from dark to light colors or if the wall has stains.
  6. Primer improves paint adhesion and ensures an even color application.

Choosing the Right Tools

Tool Purpose
High-Quality Brushes For cutting in edges near trim
Rollers Ideal for covering large surface areas
Extension Poles For high walls and ceilings
Paint Trays To evenly distribute paint on rollers
Painter’s Tape Ensures clean lines
Drop Cloths Protects floors and furniture

Investing in quality tools prevents common issues like streaks, uneven application, or excessive dripping.

Mastering Expert Painting Techniques

  1. Cutting In: Start by “cutting in” around edges such as windows, doors, and ceilings using an angled brush. This creates clean boundaries before using rollers on larger areas.
  2. Maintain a Wet Edge: To avoid visible lines where sections overlap, always maintain a wet edge when rolling paint onto walls.
  3. Load your roller evenly by rolling it through the tray several times.
  4. Use a “W” pattern when rolling on paint; this ensures even coverage without streaks.
  5. Layer Thin Coats:
    Applying two thin coats rather than one thick coat reduces drips while improving durability and finish quality.
  6. Finish Details Last: After completing walls and ceilings, focus on touch-ups around trim or any missed areas for seamless results.

Creating Impact with Colors and Finishes

  • Opt for lighter shades in smaller rooms to create an illusion of space.
  • Use accent walls to add depth without overwhelming a room.
  • Neutral tones are versatile but pair well with bolder furniture pieces.
  • Selecting Finishes by Room Type: | Finish Type | Best For | |——————–|——————————–| | Matte/Flat | Low-traffic rooms like bedrooms| | Eggshell | Living rooms & dining areas | | Satin | Kitchens & bathrooms (easy cleaning)| | Semi-gloss/Glossy | Trim work & high-moisture spaces|

Transforming your home through expert painting techniques doesn’t have to be overwhelming if you approach it methodically with proper preparation, tools, techniques, and design choices tailored specifically to your space’s needs.


How Often Does Your Home Need Interior & Exterior Painting Florida for Lasting Beauty

Handsome painter paints the wall Blue collar worker painter paints the walls house painters stock pictures, royalty-free photos & images

Maintaining the curb appeal and structural integrity of your home requires regular upkeep, and one of the most critical elements is exterior painting. The frequency with which you should repaint your home’s exterior depends on several factors, including the type of material, paint quality, climate conditions, and overall maintenance. Below is a comprehensive guide to help you understand how often your home’s exterior should be painted for lasting beauty.

Factors Affecting Repainting Frequency

  1. Exterior Material
    Different building materials react differently to weather conditions and wear over time. Here’s an estimated timeline based on common materials:
Material Repainting Frequency
Wood Siding Every 3-7 years
Stucco Every 5-6 years
Brick (painted) Every 12-15 years
Vinyl Siding Every 10-20 years (if painted)
Aluminum Siding Every 5-10 years
  1. Quality of Paint
    High-quality paints last longer than lower-grade options. Investing in premium paints with UV protection, moisture resistance, and durability can extend the lifespan of your paint job.
  2. Homes in harsh climates (e.g., intense sunlight, heavy rainfall, or snow) may require more frequent painting due to increased exposure to wear and tear. Coastal homes are particularly susceptible to salt damage and humidity.
  3. Urban pollution can also lead to faster fading or discoloration.
  4. Maintenance Practices
    Regular cleaning of the exterior surface removes dirt, grime, mold, or mildew that could degrade paint over time. Proper maintenance could delay the need for repainting.

Signs That It’s Time to Repaint

  • Peeling or cracking paint
  • Faded colors
  • Visible water damage or stains
  • Bubbling or blistering paint in areas exposed to moisture
  • Chalky residue when you rub your hand against painted surfaces

Addressing these issues promptly ensures better protection for your home’s structure.

Tips for Extending Your Paint Job’s Lifespan

  1. Choose Weather-resistant Paints: Opt for paints designed specifically for exterior use that offer protection against UV rays and water damage.
  2. Prepare Surfaces Properly: Cleaning surfaces thoroughly before painting improves adhesion and ensures a long-lasting finish.
  3. Use Primer Where Necessary: Applying a primer helps create an even base coat on porous materials like wood or brick.
  4. Inspect Annually: Check regularly for early signs of wear so small issues can be addressed before they lead to costly repairs.

A proactive approach combined with high-quality materials ensures not only an attractive appearance but adds value and longevity to your home as well as its protective layers over time.

Tips from Florida painters on how often to repaint your home’s exterior

Painting your home’s exterior is a crucial aspect of preserving its aesthetic appeal and structural integrity. Determining how often you should repaint depends on various factors, including the type of material, the quality of paint used, and environmental conditions. Below is a comprehensive guide to help you determine the best frequency for painting your home’s exterior.

Factors That Affect Repainting Frequency

  1. Material of Your Home’s Exterior
    Different materials have varying durability when it comes to holding paint. Here’s an approximate timeline based on common exterior materials:
Material Recommended Repainting Frequency
Wood siding Every 3-7 years
Stucco Every 5-10 years
Brick (painted) Every 12-15 years
Fiber cement siding Every 10-15 years
Aluminum siding Every 5-8 years
  1. Quality of Paint Used
    High-quality paints are designed to last longer and resist weather-related wear and tear better than low-quality options. Opting for paints with advanced formulas can extend the life of your home’s exterior finish by several years.
  2. Homes in regions with extreme weather fluctuations—such as harsh winters, strong UV exposure, or heavy rainfall—tend to need repainting more frequently.
  3. Coastal homes are especially vulnerable to salt air and humidity, which can cause paint to deteriorate faster.
  4. Maintenance Practices
    Regular maintenance helps prolong the life of exterior paint. Simple practices like washing your home annually to remove dirt, mold, and mildew can prevent premature fading or peeling.

Signs It’s Time to Repaint

  • Peeling or Cracking Paint: This indicates that moisture has penetrated beneath the surface.
  • Faded Color: UV rays can cause pigments in paint to break down over time.
  • Chalking: A powdery residue on your walls suggests that the paint is degrading.
  • Exposed Wood or Substrate: If you can see raw material due to chipped or worn-out paint, immediate repainting is necessary to protect against rot or damage.

Tips for Extending Paint Longevity

  1. Choose Weather-Resistant Paints: Look for paints specifically labeled as UV-resistant or water-resistant.
  2. Prepare Surfaces Thoroughly Before Painting: Proper cleaning, sanding, and priming ensure better adhesion and durability.
  3. Use Professional Painters When Necessary: Professionals often have access to higher-grade products and techniques that result in a more durable finish.
  4. Invest in Quality Sealants: Applying a high-quality sealant over areas prone to wear (e.g., near gutters) creates an additional protective barrier.

Conclusion

By understanding how factors like material type and environmental conditions affect your home’s exterior paint longevity—and conducting regular maintenance—you can ensure lasting beauty while protecting your investment. Use this guide as a foundation when planning your next painting project for optimal results tailored to your home’s specific needs.

Transform Your Living Space with a Trusted Painting Company Florida

Revamping your living space through professional painting is one of the most effective and transformative ways to refresh your home’s aesthetic. Whether you’re aiming for a subtle update or a bold new look, professional painting can deliver exceptional results. In this guide, we will explore essential aspects of using professional painting services to enhance your interiors, from color selection to preparation and execution.

Benefits of Professional Painting Services

  • Quality Results: Professional painters have the skills and experience to ensure smooth, even finishes with precise detailing.
  • Time Savings: With their efficiency, professionals complete the job faster than DIY efforts would allow.
  • Proper Preparation: Experts know how to prepare surfaces by cleaning and priming them for long-lasting results.
  • Access to Tools and Materials: Professional painters use high-quality brushes, rollers, sprayers, and paints suited for each specific job.
  • Expertise in Color Matching: They can help you choose colors that complement your style and existing decor.

1. Assess and Plan

Before beginning any painting project, assess the space you want transformed. Consider factors such as room size, lighting conditions, existing furniture, and desired mood. A clear plan ensures cohesive design choices that align with your goals.

2. Choose the Right Colors

  • Use lighter tones like whites or pastels to make small rooms feel larger.
  • Choose warm hues (e.g., beige or terracotta) for spaces where comfort is prioritized.
  • Cooler tones such as blues or grays create a calming environment.
  • Opt for accent walls in bold colors for added visual interest.

3. Prioritize Quality Paint Finishes

Paint finish plays an important role in both durability and appearance: | Finish Type | Best For | Characteristics | |——————–|——————————-|——————————————| | Matte/Flat | Bedrooms & Ceilings | Non-reflective; hides imperfections well | | Eggshell | Living Rooms & Hallways | Slightly reflective; easy-to-clean | | Satin | Kitchens & Bathrooms | Smooth finish; durable against moisture | | Semi-gloss/Gloss | Trim & Doors | Highly reflective; resistant to wear |

4. Surface Preparation Is Key

The quality of surface preparation directly influences the outcome of the project:

– Remove dirt, dust, and grease using appropriate cleaning solutions.

– Repair cracks or imperfections with spackle or putty.

– Sand rough surfaces to ensure smooth application.

– Apply primer if necessary—especially when covering dark colors or porous surfaces.

Hiring Professionals vs DIY

While DIY painting projects might seem cost-effective initially, they often require considerable time, effort, and skill development to achieve comparable results as professionals.

Criteria Professional Painters DIY Projects
Time Commitment Minimal; professionals work efficiently High; requires personal effort
Cost Higher upfront cost Lower initial investment
Equipment & Materials Provided by professionals Must purchase tools independently
Skill Level Required Expertise ensures flawless results Requires learning techniques

Final Touches

Once walls are painted beautifully by experts:

1. Add complementary decor items like artwork or textiles.

2. Update light fixtures that align with your refreshed color scheme.

3. Reintroduce furniture strategically—ensuring it complements freshly painted walls.

By enlisting professional painters combined with thoughtful design choices during planning stages—your living space will truly feel revitalized while providing lasting enjoyment.

The Ultimate Guide to Revamping Your Living Space with Professional Painting

Revamping your living space with professional painting is one of the most effective ways to refresh your home’s appearance, enhance its value, and personalize it to fit your style. Whether you’re looking for a subtle transformation or a bold statement, professional painting offers precision, durability, and superior results. Below, we’ll explore key aspects of updating your interiors and exteriors with the help of experienced painters.

Benefits of Professional Painting Services

  • Expertise and Quality: Professionals bring years of experience, ensuring crisp lines, smooth finishes, and even application.
  • Time-Efficiency: Experienced painters complete projects faster by using proven techniques and high-quality tools.
  • Access to Premium Materials: Professionals typically have access to high-grade paints that offer better coverage and longevity.
  • Custom Recommendations: They can advise on color schemes, textures, and finishes that best suit your space.

Steps to Revamp Your Living Space

  1. Decide which rooms or areas require painting.
  2. Determine whether you want full coverage or accent walls for added depth.
  3. Warm tones (e.g., beige, terracotta) create cozy spaces like bedrooms.
  4. Cool tones (e.g., blue, gray) work well in offices or bathrooms for a calming effect.
  5. Highlight architectural features with contrasting colors.
  6. Matte finish: Ideal for low-traffic areas; hides imperfections but less durable.
  7. Satin or eggshell finish: Great for living rooms or hallways due to their slight sheen and easy maintenance.
  8. Semi-gloss or gloss finish: Perfect for kitchens and bathrooms as they resist moisture.
  9. Move furniture away from walls or cover it with protective sheets.
  10. Patch cracks or holes in walls before beginning the project.
  11. Look for licensed contractors who prioritize safety protocols during painting jobs.
  12. Request references and portfolio samples from previous projects.

Interior Painting Trends

Trend Description
Accent Walls A single bold-colored wall adds character without overwhelming.
Two-Tone Walls Combining two shades creates visual interest in larger spaces.
Textured Finishes Faux finishes like marble or concrete are gaining popularity.
Earthy Neutral Palettes Subtle browns, beiges, and greens offer timeless sophistication.

When Should You Repaint?

  • High traffic areas (e.g., hallways): Every 2–3 years
  • Bedrooms & living rooms: Every 5–7 years
  • Kitchens & bathrooms: Every 3–4 years due to humidity exposure

Revamping your living space through professional painting ensures a flawless finish while saving time and effort. By carefully selecting colors, finishes, and trends tailored to each room’s function, you can create an inviting home environment that truly reflects your style.

Expert House Painters Florida: Transforming Your Outdoor Spaces with Durable and Aesthetic Paint Solutions

Transforming your outdoor spaces with the right paint not only enhances the aesthetic appeal of your property but also provides long-lasting protection against environmental factors like harsh weather, UV rays, and moisture. Choosing durable and aesthetically pleasing paint solutions ensures that your outdoor spaces remain vibrant and functional for years to come. Below are essential tips, considerations, and techniques to help you achieve stunning results.

Benefits of High-Quality Outdoor Paint

Painter Preparing to Paint Apartment Walls Painter in an apartment prepares to paint walls, holding lime and brushes, ready to start a fresh and precise renovation. house painters stock pictures, royalty-free photos & images

  • Weather Resistance: Premium exterior paints are formulated to withstand extreme conditions such as rain, humidity, heat, and frost.
  • UV Protection: High-quality paints help prevent fading caused by prolonged sun exposure.
  • Durability: These paints resist peeling, cracking, or blistering over time.
  • Easy Maintenance: Dirt-resistant finishes make cleaning effortless while maintaining their original look.
  • Enhanced Curb Appeal: Vibrant colors and smooth finishes create a welcoming atmosphere.

Selecting the Right Paint for Outdoor Use

  1. Acrylic Latex Paint: Best for most exterior surfaces due to its flexibility and resistance to moisture.
  2. Oil-Based Paint: Offers excellent durability but may require more drying time.
  3. Masonry Paint: Ideal for concrete or brick surfaces as it resists cracking.
  4. Satin or eggshell finishes work well on walls by offering a balance between durability and aesthetics.
  5. Glossy finishes are better suited for trim or doors due to their reflective properties.
  6. Opt for neutral tones or earth-inspired hues for timeless elegance.
  7. Use bold accents sparingly on doors or trims for added character.
Surface Type Recommended Paint Type Suggested Finish
Wood Deck Acrylic Latex Semi-Gloss
Concrete Patio Masonry Satin
Metal Railings Oil-Based Glossy

Preparing Outdoor Surfaces Before Painting

  1. Clean all surfaces thoroughly using pressure washing or scrubbing tools to remove dirt, grime, mold, or mildew.
  2. Repair cracks or holes in walls using caulk or filler materials before proceeding with painting.
  3. Sand wooden surfaces lightly to smooth rough edges or peeling areas.
  4. Apply a high-quality primer designed specifically for exterior use to promote adhesion.

Tips for Painting Your Outdoor Spaces

  • Choose a dry day with mild temperatures (between 50°F–85°F) to prevent issues like uneven drying or poor adhesion caused by humidity.
  • Use high-quality brushes or rollers designed specifically for exterior projects; these tools provide better coverage while ensuring an even coat.
  • Work in sections from top to bottom; this approach reduces streaks caused by overlapping wet edges.

Maintaining Painted Outdoor Surfaces

  • Wash painted surfaces annually using mild soap and water to remove dirt buildup.
  • Inspect annually for signs of wear such as peeling paint; touch up small areas promptly if needed.
  • Trim nearby vegetation regularly so branches don’t scrape painted walls.

By selecting durable products combined with thoughtful design choices, you can create outdoor spaces that are both functional and visually appealing while standing the test of time.

Key Considerations Before Starting a Painting Project in Your Home

Planning a painting project for your home involves more than simply choosing colors and picking up a brush. To ensure that your efforts yield long-lasting and visually appealing results, several factors must be considered before starting. Below, we outline essential considerations to guide you through the process.

Assessing the Scope of Your Project

Before diving into a painting project, determine the following:
– What areas need painting? Are you working on interior walls, ceilings, or exterior surfaces?
– What is the current condition of the surface? Cracks, peeling paint, or uneven textures may require preparation work like patching or sanding.
– How large is the area? Measuring square footage helps in estimating paint volume and time required.

Choosing the Right Paint Type

Paint Type Best For Characteristics
Latex (Water-Based) Interior & Exterior Easy to clean; low odor
Oil-Based High-moisture areas Durable; smooth finish
Acrylic Exterior surfaces Fade-resistant; weatherproof

Additionally, consider finishes such as matte, eggshell, satin, semi-gloss, or gloss depending on your needs for appearance and maintenance.

Surface Preparation Is Key

Proper preparation ensures professional results and extends the lifespan of your paint job. Steps include:
1. Cleaning surfaces to remove dust and grease. A simple mix of water and mild detergent works well for most walls.
2. Repairing imperfections like cracks or nail holes using spackle or filler material. Sand smooth once dry.
3. Applying primer if necessary: – Use primer on new drywall for better adhesion. – Opt for stain-blocking primers if covering dark colors or stains.

Skipping preparation can lead to peeling paint and uneven application.

Selecting Color Palettes That Suit Your Space

  • Neutral Tones: Ideal for creating calm, timeless settings in bedrooms or living rooms (e.g., beige, gray).
  • Bold Colors: Make an impact in accent walls but use sparingly to avoid overwhelming small spaces (e.g., deep navy).
  • Light Colors: Enhance natural lighting in smaller rooms by reflecting light effectively (e.g., pastel shades).

Test samples on walls before committing to ensure proper lighting brings out their true hues.

Budgeting Wisely

  1. Paint (1-gallon covers ~350 sq ft per coat).
  2. Primers if required.
  3. Brushes/rollers based on surface textures.
  4. Account for labor costs if hiring professionals.
  5. Factor in unexpected expenses—set aside 10%-15% of your budget as contingency.

Budget-friendly tip: Buy materials during seasonal sales from hardware stores.

Timing Your Painting Project

  • Avoid rainy seasons—dry weather ensures better drying times.
  • Spring/Fall offers moderate temperatures ideal for outdoor painting tasks.
  • Plan when traffic at home is minimal for uninterrupted work time.
  • Ensure proper ventilation during colder months with water-based paints to reduce odors.

Being mindful of these considerations will help streamline your painting endeavor while ensuring optimal results tailored to both function and style preferences within your home environment.

Top Benefits of Choosing Painting Services Florida for a Flawless Finish

When it comes to painting your home, the quality of the work can significantly impact the overall appearance and longevity of the paint job. While DIY painting projects are popular for cost-saving purposes, hiring professional painters offers a range of advantages that often make it a worthwhile investment. Below, we explore the key benefits of working with expert painters and how their expertise ensures a flawless finish.

High-Quality Results That Last

  • Surface Preparation: Proper cleaning, sanding, priming, and filling cracks or holes are critical steps that professionals handle meticulously before applying paint.
  • Even Coating: Experts use advanced tools like spray guns or high-quality rollers to achieve an even application without streaks or brush marks.
  • Premium Products: Many professional painters have access to high-grade paints and finishes that provide better coverage and durability compared to standard options.

Time Efficiency

Painting an entire room—or an entire home—can be time-consuming if you’re inexperienced. A professional team will streamline the process by using efficient techniques while maintaining excellent results. Their ability to stick to deadlines ensures your project is completed quickly without compromising quality.

Task DIY Time (Approx.) Professional Time (Approx.)
Prepping Walls 3–5 hours 1–2 hours
Painting Single Room 4–6 hours 2–4 hours
Cleanup 2+ hours 30–60 minutes

Cost-Effectiveness in the Long Run

  • Reduced need for frequent touch-ups or repaints.
  • Proper application methods that prevent peeling or flaking.
  • Minimized waste of paint through precise measurements.

Access to Professional Tools & Techniques

Professionals use specialized tools such as extension ladders, drop cloths, edgers, and sprayers for consistent results. Additionally, they are skilled in techniques like color blending and edging around trims or intricate details.

  • Painter’s Tape: Ensures clean lines around edges.
  • Drop Cloths: Protect floors from drips and spills.
  • High-End Brushes/Rollers: Provide better coverage with less effort.

Safety Assurance

Painting often involves working with chemicals (e.g., primers) or navigating hard-to-reach areas like ceilings or exterior walls. Professionals are trained in using safety equipment such as harnesses for high surfaces or masks when dealing with strong fumes. This reduces risks associated with falls or exposure to harmful substances during the project.

Expert Color Consultation

Choosing the right color palette can be overwhelming due to endless options available on the market today. Many painting companies offer personalized consultations where experts help you select colors that complement your home’s architecture and interior design style seamlessly.

  1. Opt for warm tones (e.g., beige or light brown) in living rooms for a welcoming ambiance.
  2. Use neutral shades such as white or gray in small spaces to make them appear larger.
  3. Incorporate bold accent walls strategically in bedrooms for added character.

Overall, hiring professional painters ensures that your home not only looks stunning but also benefits from long-term durability and protection against wear-and-tear elements like weathering or stains. By investing in expertise upfront, you gain peace of mind knowing your property is cared for by experienced hands.

Benefits of Hiring Professional Painters for a Flawless Finish

When it comes to painting your home, partnering with professional painters can make all the difference in achieving a polished and long-lasting result. While DIY painting projects might seem cost-effective and rewarding at first glance, there are several benefits to hiring skilled professionals that outweigh the initial expense. Below, we’ll explore why professional painters are often the best choice for ensuring a flawless finish.

Superior Expertise and Knowledge

Professional painters bring years of experience and technical knowledge to every project. They understand different paint types, surface preparations, and application techniques for achieving high-quality results. Their familiarity with tools such as brushes, rollers, sprayers, and specialized equipment ensures precision during the painting process.

  • Surface Preparation: Properly cleaning, sanding, priming, and repairing surfaces are crucial steps that professionals never overlook.
  • Paint Selection Expertise: They can recommend the best paint types (e.g., oil-based vs. water-based) and finishes (e.g., matte or semi-gloss) for your specific needs.
  • Problem-Solving Skills: For homes with issues like peeling paint or moisture damage, professionals know how to address these challenges effectively before applying new coatings.

Time Efficiency

  1. Inspecting the project area to plan the necessary steps.
  2. Preparing surfaces thoroughly before painting starts.
  3. Applying multiple coats of paint evenly and professionally.
  4. Cleaning up after completing the job—leaving your space tidy.

By delegating this responsibility to experts, homeowners save valuable time while ensuring their project is completed on schedule.

Access to Quality Materials

Experienced painters have access to premium products and materials that may not always be available at local hardware stores—or may be overlooked by non-professionals who lack specific insights into quality differences.

Professionals also understand how environmental factors such as humidity or sun exposure affect paint performance over time—and will select paints designed for lasting durability in those conditions.

Factor DIY Painters Professional Painters
Surface Preparation Often Insufficient Thorough
Application Tools Basic High-quality equipment
Paint Durability May vary Long-lasting recommendations

Cost-Effective in the Long Run

Attempting a DIY project may lead to errors like uneven finishes or selecting subpar materials—resulting in additional costs down the road when repairs are needed sooner than expected. Professional services often come with warranties or guarantee for their work, providing peace of mind that your investment is protected.

Clean-Up Services Included

  • Removing tarps/drop cloths from furniture/floors.
  • Properly disposing of leftover materials (e.g., empty cans).
  • Ensuring spaces are left spotless after completing each stage.

Aesthetic Appeal & Attention to Detail

One hallmark benefit offered by pros lies within sharp lines between walls/ceilings tricky transitions handled using advanced edging techniques unavailable through most homeowner approaches attempting similar options themselves directly leading smoother overall aesthetics particularly vital modern open-space layouts visible interconnected rooms at once demanding higher-quality seamless effects altogether delivered practiced capable teams underpinning those results properly every time meaningful difference ultimately achieved trusted specialists implementing them accordingly respective contexts overall scope projects themselves aligned expectations accordingly benchmarks desired outcomes satisfaction levels accordingly.


How Often Should Florida Painters Recommend Painting the Exterior of Your Home and What Factors Affect the Timing

Mature Worker Painting The Walls With A Paint Roller In An Empty Apartment Under Renovation Mature worker painting the walls with a paint roller in an empty apartment under renovation. house painters stock pictures, royalty-free photos & images

Painting the exterior of your home is not only about maintaining its aesthetic appeal but also about protecting it from weather elements and ensuring longevity.

General Guidelines for Repainting

The timeline for when to repaint can vary depending on several factors.

  • Brick: Usually needs a fresh coat every 15–20 years if painted.
  • Aluminum or Vinyl Siding: Every 5–10 years depending on sun exposure.

These timelines assume proper preparation and high-quality paint were used during the last application. Deviations may occur based on other influencing factors.

Factors That Impact Repainting Frequency

  1. Climate and Weather Conditions
    Homes in harsh climates experience more wear and tear.
  2. Areas with intense sunlight (e. g. , desert regions) may fade paint faster.
  3. Coastal areas face salt air, which can cause chipping or peeling sooner.
  4. Locations with heavy rainfall or snow may lead to moisture damage over time.
  5. Quality of Paint Used
    Higher-quality paints generally have longer lifespans due to their durability and resistance to fading or peeling.
  6. Previous Paint Job Quality
    Proper surface preparation—such as cleaning, priming, and applying multiple coats—significantly extends paint life.
  7. Home’s Exposure to Sunlight
    UV rays not only fade paint but also cause cracking over time. Southern-facing sides of homes often require more frequent touch-ups.
  8. Maintenance Practices
    Regularly cleaning surfaces (e. g. , power washing) can help remove dirt, mold, or algae that degrade paint faster.

Special Considerations for Older Homes

Homes built decades ago may require more frequent painting due to outdated materials or older coats of lead-based paint that need careful removal before repainting begins.

Keeping Track of Your Home’s Painting Needs

Surface Material Expected Lifespan Last Painted Next Expected Repaint
Wood Siding 3–7 Years [Insert Date] [Insert Date]
Stucco 5–10 Years [Insert Date] [Insert Date]
Brick 15–20 Years [Insert Date] [Insert Date]

Tips To Extend Paint Life

  • Wash your home’s exterior annually to remove debris that accelerates deterioration.
  • Address minor cracks or damages early to prevent them from worsening.
  • Choose high-quality paints formulated for your region’s climate.

How a Painting Company Florida Recommends the Best Time to Repaint Your House

However, the frequency at which you should repaint depends on several factors. Understanding these elements can help homeowners make informed decisions and protect their property from premature wear and tear.

1.Material of the Exterior Surface


Wood Siding: Typically requires repainting every 3–7 years due to its natural tendency to absorb moisture and weather quicker than other materials.
Stucco: Generally lasts longer, with a repaint cycle of 5–10 years depending on exposure to environmental elements.
Brick: Painted brick can last 15–20 years if maintained properly. Unpainted brick does not require regular painting but may need occasional upkeep like sealing.
Fiber Cement
Vinyl Siding: While vinyl technically doesn’t need painting as often, a fresh coat might be needed every 10 years for aesthetic updates or color changes.

2.Weather Conditions and Climate

Environmental factors play a critical role in determining how long your home’s paint job will last:
– Homes in areas with frequent sunlight or high UV exposure (e. g. , deserts) may see fading or cracked paint more quickly, requiring touch-ups every few years.

– Coastal homes are exposed to salty air and high humidity levels, which can cause paint to deteriorate faster.

– Regions with extreme winters or heavy rain may lead to peeling or cracking paint due to moisture penetration.

Climate Type Average Repaint Cycle
Dry/Sunny Every 4–7 years
Humid/Coastal Every 3–5 years
Mild/Temperate Every 7–10 years

3.Quality of Paint Used

Not all paints are created equal. High-quality exterior paints generally last longer than lower-grade options:

– Premium paints often come with better pigments and binders that improve longevity.

– Lower-cost paints might save money upfront but could require more frequent applications over time.

Opting for paint labeled as “weather-resistant” or designed specifically for your region’s climate can further extend the lifespan of your paint job.

4.Previous Preparation Work

How well the surface was prepared before the previous coat was applied is another factor:

– Proper cleaning, sanding, and priming ensure that paint adheres correctly and lasts longer.

– Skipping steps like priming or applying sufficient coats can lead to premature peeling or cracking.

5.Maintenance Habits

– Inspect for cracks or signs of wear annually—small fixes now can prevent larger issues later.

– Address areas exposed to excessive moisture (e. g. , near gutters) promptly.

Proper planning ensures both functional protection against weathering and an aesthetically pleasing appearance for many years ahead.

How to Recognize When You Need House Painters Florida for a Fresh Coat of Paint

Regular maintenance of your home’s exterior is essential not only for aesthetic purposes but also to protect the structure from weather-related damage. Over time, paint can deteriorate, leaving your home vulnerable to issues such as wood rot and moisture infiltration.

Common Signs Your Home Needs Repainting

  1. One of the most visible signs is peeling or cracking paint. This occurs due to prolonged exposure to sunlight, moisture, or poor-quality paint. Once the protective layer of paint is compromised, the underlying material becomes exposed to potential damage.
  2. Fading occurs naturally under harsh sunlight and environmental conditions. If your current color looks dull compared to how it originally appeared or has uneven fading across different sections, it might be time for repainting.
  3. Chalking refers to a powdery residue found on painted surfaces when they deteriorate over time. To test for chalking, rub your hand over the surface—if you notice powdery particles transferring onto your skin, this could mean your home needs attention soon.
  4. Blisters or bubbles in the paint indicate moisture trapped beneath the surface layer. This problem often signals improper sealing or water infiltration issues that need immediate resolution before repainting.
  5. If you notice wood rot around windowsills, door frames, or other wooden elements on your exterior, consider this a red flag that painting isn’t just cosmetic but necessary to seal and protect these areas from further decay.
  6. Even if there are no visible structural signs of deterioration, an outdated color scheme might warrant refreshing the look of your home to maintain curb appeal.

Environmental Factors Contributing to Deterioration

  • Climate: Homes in sunny regions may experience faster fading due to UV rays, while those in humid climates face challenges like mold and mildew growth.
  • Proximity to Water: Coastal homes are exposed to salt air which promotes corrosion and damages paint more quickly.
  • Quality of Previous Paint Job: Poor preparation work before painting or low-quality paints often lead to shorter lifespans.
  • Frequency of Maintenance: Regular cleaning reduces dirt buildup and helps prevent issues like mold growth or insect damage.

How Long Does Exterior Paint Typically Last?

The longevity of exterior paint varies based on materials: | Surface Material | Typical Lifespan | |——————-|——————| | Wood | 3–7 years | | Stucco | 5–10 years | | Brick | 15–20 years | | Aluminum/Vinyl Siding | 15–20 years |

Tips for Staying Ahead

To avoid emergency repainting:

– Conduct visual inspections every year.

– Clean painted surfaces regularly using mild soap and water.

– Address minor cracks and chips promptly before they worsen.

– Opt for high-quality paints designed specifically for outdoor use during repainting projects.

Step-by-Step Guide to Preparing Your Home for Painting Services Florida

Proper preparation is essential to achieving a high-quality, long-lasting paint job. Skipping or rushing through preparation can lead to uneven finishes, peeling, and reduced durability. Below is a detailed guide to help you properly prepare your house for a flawless new paint job.

Step 1: Assess the Condition of the Surface

Before beginning any painting project, carefully inspect the surfaces you plan to paint.
– Cracks and holes in walls or siding
– Peeling, blistering, or flaking paint
– Mold, mildew, or algae growth
– Dirt and grime buildup

Addressing these issues ensures smooth application and better adhesion of the new paint.

Step 2: Clean the Surfaces Thoroughly

Dirt, dust, and grease can prevent paint from adhering properly. Cleaning your surfaces is non-negotiable.
Power Washing: Ideal for exterior walls to remove grime effectively.
Soap and Water: Suitable for interior walls with minimal dirt accumulation.
Specialized Cleaners: Use trisodium phosphate (TSP) or similar cleaning agents for stubborn stains or grease spots.

Allow adequate drying time after cleaning.

Step 3: Repair Any Damage

labour worker paints a window frame in an old empty house Renovation work on a historic villa house painters stock pictures, royalty-free photos & images

Addressing surface damage helps improve both appearance and durability.

Type of Damage How to Fix Tools Needed
Small cracks Fill with caulk or spackling paste Caulking gun, putty knife
Large holes Use patch kits; sand edges smoothly Drywall patch kit
Loose siding Nail down loose boards Hammer
Rotting wood Replace affected sections Saw

After repairing damaged areas, sand them down to create an even surface.

Step 4: Remove Existing Paint (If Necessary)

If the previous coat of paint shows signs of deterioration such as peeling or bubbling, remove it before repainting:

1. Scrape off loose paint using a scraper.

2. Sand down rough patches with medium-grit sandpaper.

3. For extensive removal needs, consider using a chemical paint stripper.

This step ensures that your new coat adheres smoothly without imperfections caused by old layers.

Step 5: Apply Primer

Primer is crucial in sealing surfaces and creating an ideal base for your new color:

When Primer is Essential:

– Painting over bare wood or metal

– Switching from dark colors to lighter shades

– Covering stains that might bleed through

– Choose a primer suitable for your specific surface material (e. g. , oil-based primers for wood).

Apply primer evenly using brushes or rollers and allow it to dry completely before moving forward.

Step 6: Protect Adjacent Areas

Avoid accidental splatters by protecting areas around where you’ll be painting:

– Cover floors with drop cloths.

– Mask off trim edges using painter’s tape.

– Remove hardware such as doorknobs or outlet covers when painting interiors.

Taking these precautions will save cleanup time later on while ensuring clean lines in your finished work.

Step 7: Gather Your Tools

Ensure you have all necessary tools ready before starting:

– Paint brushes and rollers (various sizes)

– Ladder (if working on high areas)

– Paint trays

– Safety goggles and gloves

Having everything organized reduces interruptions during the project.

By following these steps methodically, you’ll set yourself up for success in achieving a professional-grade finish that enhances both aesthetics and durability. Careful preparation makes all the difference in ensuring your investment in time and materials pays off effectively across years ahead.

How Interior & Exterior Painting Florida Enhances Your Home’s Longevity and Aesthetic Appeal

Regular exterior painting is more than just a cosmetic upgrade. It serves as an essential maintenance activity that enhances the durability and charm of your home. Painting your house’s exterior at appropriate intervals can protect it from environmental damage, maintain its structural integrity, and improve its overall curb appeal. Below, we explore the key benefits of regular exterior painting and why it is an investment worth prioritizing.

The exterior of your home endures constant exposure to harsh weather conditions, such as UV rays, rain, snow, and humidity. Over time, these elements can cause wear and tear on unprotected surfaces.
Moisture damage: Quality paint prevents water from seeping into wood or other porous materials, reducing the risk of mold or rot.
Sun damage: UV-resistant paints shield surfaces from fading or cracking caused by prolonged sun exposure.
Temperature fluctuations: Paint can minimize the impact of expanding and contracting materials during extreme temperature changes.

Different types of siding—whether wood, stucco, vinyl, or fiber cement—require proper care to maximize their lifespan. Regular exterior painting prevents premature deterioration by sealing cracks, reducing wear from moisture intrusion, and addressing small damages before they escalate into costly repairs.

Siding Material Lifespan Without Paint Lifespan With Paint
Wood 10-15 years Up to 30 years
Stucco 40-50 years Prolonged with maintenance
Fiber Cement 50+ years Enhanced durability
Metal/Vinyl Long-lasting but benefits from aesthetic upkeep

A freshly painted home significantly boosts its visual appeal by making it look clean, inviting, and well-maintained. Choosing modern color schemes that align with neighborhood aesthetics or personal preferences can elevate the attractiveness of your property.

Key aspects to consider for curb appeal improvement include:
– Selecting timeless or trending color palettes for maximum impact.

– Using accents on trims or shutters to highlight architectural features.

– Ensuring professional application for a polished finish.

A well-maintained facade not only increases personal pride in ownership but also makes a positive impression on visitors or potential buyers if you’re considering selling.

Exterior painting adds measurable value to your property by improving both its appearance and structural integrity. Homes with fresh paint often command higher resale prices because buyers perceive them as move-in ready with reduced future maintenance needs.

Addressing external paint issues early reduces repair costs in the long run by catching problems before they escalate into larger structural concerns such as rotting wood or water leaks.

Key Advantages Impact on Your Home
Protection Shields against environmental damage
Durability Extends lifespan of siding materials
Curb Appeal Enhances aesthetic charm
Value Increases marketability
Cost Efficiency Prevents expensive repairs over time

Maintaining a regular schedule for repainting ensures that your home remains protected, aesthetically pleasing, and structurally sound throughout changing seasons and environmental challenges.

How to Choose the Perfect Interior Paint Color and Finish for Your Space

Selecting the ideal paint color and finish for your interior space is a critical step in achieving a cohesive and visually appealing environment. The right choices can enhance the mood of a room, highlight architectural features, and balance natural light. Below, we’ll explore how to pick the perfect combination of colors and finishes while considering factors such as purpose, style, and lighting.

Steps to Choose the Perfect Paint Color

  1. Identify how you plan to use the space.
    • Bedrooms: Opt for calming colors such as soft blues or muted greens.
    • Kitchens: Consider warm tones like yellows or greiges that create an inviting atmosphere.
    • Living Rooms: Neutral palettes work well for flexibility, while accent walls can add personality.
  2. Natural Light:
    • North-facing rooms: Use warmer shades to counteract cooler light tones.
    • South-facing rooms: Almost any color will work due to balanced natural light.
    • LED bulbs often amplify cool tones, so consider warmer hues if using cooler white lights.
  3. Use sample pots or swatches on different walls of your room.
  4. Observe how they look at various times of day under both natural and artificial lighting.
  5. Cool tones (blues, greens): Promote relaxation and calmness.
  6. Warm tones (reds, oranges): Encourage energy and stimulation.
  7. Neutrals (whites, grays): Offer versatility for a timeless look.

Selecting the Right Finish for Your Space

The type of finish you select impacts not only aesthetics but also functionality.

Finish Type Characteristics Best Used In
Flat/Matte Non-reflective; hides imperfections Ceilings, low-traffic areas
Eggshell Slight sheen; easy to clean Living rooms, dining rooms
Satin Durable with smooth appearance Hallways, family rooms
Semi-gloss Reflective; highly durable Kitchens, bathrooms
High-gloss Very reflective; bold statement Doors, trim

Tips for Harmonizing Colors

  • Choose a Color Palette: Select three main colors—a dominant shade (60%), a secondary color (30%), and an accent hue (10%).
  • Coordinate with Decor: Match paint with furniture or artwork in your space to maintain harmony.
  • Think Beyond Walls: Don’t forget ceilings and trim—they can complement or contrast with wall colors.

Common Mistakes to Avoid

  1. Ignoring undertones in colors—grays may lean toward blue or green depending on their base tone.
  2. Rushing decisions without testing swatches in different lighting conditions.
  3. Overcomplicating with too many colors; stick to cohesive palettes.

By considering these factors carefully when choosing interior paint colors and finishes, you can create an environment that feels both functional and visually pleasing while reflecting your unique taste.